Wayward Outpost PC Controls & Keybinds
WASD to map—every bind you need on Eleske island.
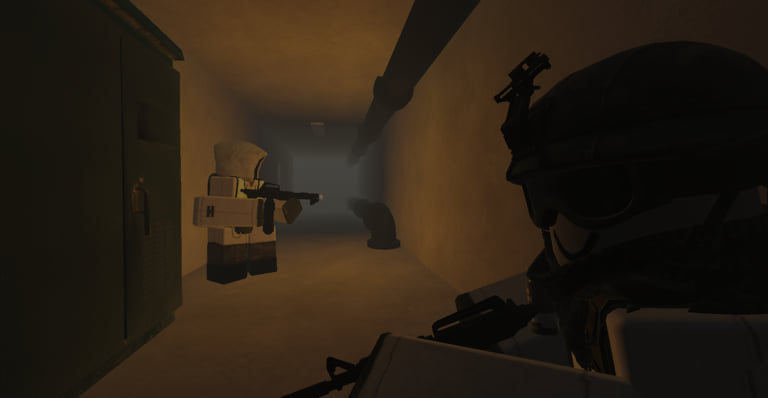
This Controls guide lists the PC keybinds that matter in Wayward Outpost, the Roblox military RP zombie logistics PvE shooter set on Eleske island. Whether you just finished Getting Started or you are jumping straight into a Bravo retake, muscle memory for interact, gas mask, map/day, and vehicle lights will save more lives than a rare rifle. Bindings below reflect the common community layout used across Outpost Alpha, Bravo, Abley Harbour, APS, Stafford Airfield, and CBRN approaches to the Hive/Hellmouth. If a private server remaps keys, re-check in Roblox settings—but most public sessions follow this scheme.
Pair this page with Logistics when you start driving supply trucks, and with Hellmouth Hive before you rely on N under green mist. Class choices on the Players Hub do not change the base movement keys, but CBRN and Radioman players should treat mask and map checks as non-negotiable habits.
Full PC controls table
| Action | Key | Notes |
|---|---|---|
| Move | WASD | Strafe while aiming; do not sprint blindly into mist. |
| Crouch | C | Lowers profile behind sandbags and truck beds. |
| Interact / bash | E | Doors, repairs, supply nodes, contextual bash. |
| Fire | LMB | Primary trigger for firearms. |
| Aim / ADS | RMB | Stabilize shots before dumping mags. |
| Reload | R | Reload behind cover; call “reloading” on voice if you can. |
| Flashlight | F | Body/tactical light for dark interiors. |
| Weapon light | T | Weapon-mounted light when available. |
| Bayonet | V | Close-quarters stab when ammo is dry or silence matters. |
| Gas mask | N | Essential for CBRN zones and toxic mist. |
| Map / day counter | M | Opens map and shows server day (often starts ~28). |
| Vehicle honk | H | Signal convoys and clear roads politely. |
| Vehicle headlights | L | Night logistics and fog driving. |
Print or screenshot the table for your first few sessions. New players usually forget N and M under stress—the two keys that prevent CBRN deaths and missed Day 40 planning.
Movement and stance tips
WASD + C is enough for most firefights, but how you move matters. Crouch when holding Alpha wire or Bravo windows so infected take longer to spot you. Strafe while reloading instead of standing still in doorways. When Engineers repair, Infantry should cover flanks rather than clustering on the repair prompt—one grenade or runner wave deletes the whole squad. On open roads between Alpha and Bravo, keep spacing so a single Callous later in the wipe cannot delete a clumped truck column.
Bayonet (V) is a panic tool and a quiet tool. Use it when a lone infected breaks melee range and your mag is empty, or when you need a silent finish inside a building before the room aggroes. It is not a substitute for aimed fire against special infected near APS as Day 40 approaches—see Day 40.
Shooting fundamentals
RMB aim before you hold LMB on longer lanes such as airfield approaches or harbour docks. Hip-fire only in true panic melee range. Reload (R) after every short engagement while a teammate covers; dry-gun hero plays are how Bravo falls again. Marksman and Auto Rifleman players should still obey these basics—class fantasy does not refill an empty belt. For where specialty guns spawn, use Weapon Locations after your binds feel natural.
Flashlight (F) and weapon light (T) are not cosmetics. Arctic interiors, hangars at Stafford Airfield, and below-deck or bunker spaces eat depth perception. Toggle lights off when you need stealth; toggle them on when friendlies are about to walk into a crawlspace full of biters. Communicate light discipline on larger pushes so the whole squad is not broadcasting positions from a ridgeline.
Gas mask (N) discipline
Press N to equip or swap your gas mask workflow before you smell trouble. Hellmouth and other CBRN spaces punish bare faces; green mist is not a suggestion. Even outside the Hive, keep the mask key in your finger memory so a sudden hazard near APS or a contaminated interior does not end your life while you hunt the keyboard. CBRN class players should treat mask checks like reload checks. If your squad is under-geared, abort and read Hellmouth Hive instead of “testing” the mist.
Map and day counter (M)
M opens your tactical map and the server day readout. Many live servers begin around Day 28, so you are already mid-crisis. Track the climb toward Day 40, when Marine (~1k reputation) and Crashed Pilot (~10k reputation) unlock windows open and special infected pressure rises near Alpha and APS. Checking the map also prevents getting lost between Abley Harbour, Irueno City, and the airfield during convoy handoffs described in Logistics.
Use the map before you commit a truck. A bridge that is still down turns a materials run into a zombie parade. If Engineers are mid-repair, stage cargo instead of forcing the route—controls knowledge includes knowing when not to drive.
Vehicle controls: honk (H) and headlights (L)
Supply trucks, APCs, and other vehicles are the bloodstream of Eleske. H honks to warn friendlies at gates, signal “ready to roll,” or wake AFK riders. Do not spam honk during stealth segments, but do use it when a convoy leaves Alpha so Infantry can mount up. L headlights matter on night runs and in fog; driving dark looks cool until you miss a turn into a runner swarm.
When you finally field an APC via How to Get the APC, practice these vehicle binds in a safe Alpha loop before you drive into contested Bravo roads. A repaired APC with a driver who cannot find headlights is still a liability.
Interact (E) beyond doors
E is overloaded on purpose: doors, supply interactions, repair assists, contextual bash, and world pickups. Face the prompt cleanly; spam-clicking while looking at the floor wastes seconds during Bravo breaches. Engineers live on E. Supports and Radiomen use it around ammo and drop infrastructure. If a prompt will not appear, check crouch height, corpse clutter, and whether another player is already channeling the same node.
Common mistakes
- Forgetting N until mist damage ticks.
- Never opening M, then wondering why Day 40 “suddenly” arrived.
- Driving without L at night and blaming “bad spawns.”
- Reloading in the open instead of after a strafe behind cover.
- Ignoring Codes scam warnings while looking for a “control unlock code” that does not exist.
Practice routine (five minutes)
At Alpha, walk a short loop: crouch behind cover, ADS at a sandbag, reload, toggle flashlight and weapon light, equip gas mask, open map, then hop a truck to test honk and headlights. That micro-drill beats dying at APS because you confused T and N. After the drill, rejoin a real objective—repairs, Bravo, or a materials run—and keep the Guides Hub open for the next skill you need.
Master these binds once and every other Wayward Outpost guide becomes easier. The island is large, the servers are full, and the day counter does not pause while you hunt keybinds in a settings menu mid-firefight.
Frequently Asked Questions
Quick answers for Eleske operations.
What is the gas mask key in Wayward Outpost?
Press N to use your gas mask. It is mandatory for CBRN areas and green mist such as Hellmouth Hive content.
How do I see the map and day counter?
Press M. The map view shows layout context and the server day number, which often starts near Day 28 and matters for Day 40 unlocks.
What are the vehicle light and horn keys?
H honks the horn for convoy signals; L toggles headlights for night and fog driving on supply runs.
What does E do besides opening doors?
E is the general interact and bash key—repairs, supply nodes, world interactions, and contextual melee bash depending on what you face.
Is there a different control scheme for each class?
Core movement and combat binds stay the same. Classes change gear and roles, not WASD or fire keys. CBRN players simply must use N more consistently.